Host Management
Hosts
A host in FOG is typically a computer, but it can be any network device.
Hosts are used to identify a computer on the network and are used to manage the device.
Adding a new host
Method 1: Adding a new host via Full registration
- This is the preferred method, and maybe the easiest method for getting a host into the FOG database, but it requires you to visit the host.
When at the client computer, during the boot up process when you see the PXE/iPXE boot menu select Perform Full Host Registration and Inventory.
During this phase you will be prompted for information about the host like hostname, operation system, image, groups, Product Key, and other information.
If you enter a valid operating system and image id, you will be asked to Image Now.
If desired, you can set the task and it will deploy the image on the next network boot.
After the requested information is entered, FOG will pull a quick hardware inventory the client.
This method of registration will register the mac address(primary wired only), serial number(if available in BIOS), Make/Model, and other Hardware information with the FOG server.
For more information on these commands please see: Client Side Tasks
Method 2: Adding a new host via Quick Registration
Quick registration is very much like the Full host registration, with the exception that it will not prompt you for any input, nor give you the option to image the computer directly from the registration screen. When the host is added to the FOG server, it will be named with the hosts primary mac address. This method is great for adding a lab of 30 computers to FOG quickly and easily.
This feature is disabled by default, to enable this feature:
Go to FOG Configuration

Select FOG Settings
Find section FOG Quick Registration
Tick ON FOG_QUICKREG_AUTOPOP to ✔
Set FOG_QUICKREG_IMG_ID to the image ID you would like to use for all newly created hosts.
FOG_QUICKREG_OS_ID will be auto populated when “Save Changes” is selected. (OS is now associated within the image so no need to select an OS)
- Change FOG_QUICKREG_SYS_NAME to what you would like to name you new machines, where
*will be replaced by a number. If you would like to zero pad numbers you can use LAB300-** which would result with LAB300-03 or LAB300-09.
- Change FOG_QUICKREG_SYS_NAME to what you would like to name you new machines, where
- Set FOG_QUICKREG_SYS_NUMBER to the first number you would like to use.
After each registration the computer will automatically image and the FOG_QUICKREG_SYS_NUMBER will incremented by 1.
Method 3: Manually Adding
Adding a new host can be done in the hosts section of FOG.

Then by clicking on the “Add New Host” button on the left hand menu.
At least a hostname and a MAC address must be entered in order to add the host to the FOG database.
Required Fields
A host consists of the following Required Fields:
Hostname
A string used for the Windows Hostname of client, this must be less than 15 characters long.
MAC address
This field is used in for for a unique identifier for the host. The string must be separated by
:(colon), in the format of00:11:22:33:44:55.
Optional Fields
Hosts can also include, but are not required:
Description
Information for your own reference.
Image Association
This field is a drop down box that will allow you select an image object created in the Images section.
Operating System
Drop down box that allow you to select the primary type of operating system running on this host.
Kernel
This is only used if you want to overwrite the default kernel used for FOG. Needs to be specified as fog/kernel/mybzImage
Kernel Arguments
This allows you to add additional kernel arguments for booting the host (ie: vga=6, or irqpoll).
Primary Disk
This option allows you to force a device to use during imaging if fog fails to detect the correct device node.
Note
This page also allows for configuration of Active Directory integration, but this topic will be covered later.
When all settings are added, click on the “Add” button.
Method 4: Importing Host Information
When getting started with FOG, you need to enter the host information for the devices on your network. We understand this can be a long difficult process, so in order to make this process easier we created a page that allows you to import most of the host information from a CSV file.
The CSV file that is imported to FOG must be in the following format, and the file should not have a header row.
MAC Address,Host name,Description,OSID,ImageID
The MAC Address required is the NIC’s MAC address seperated by
:(colon).The Host name required is the computer’s Host name (must be less than 15 characters, should not include underscores, according to [http://tools.ietf.org/html/rfc952 | Network Working Group ]).
The ‘Description Can be Left as Blank is any text description you would like associated with the computer.
The OSID required is the number representing the operating system. It can be found in the table “supportedOS” in the field osID.
The ImageIDrequired is the number representing the images file linked to this image. The image definition must already exist and this number can be found in the table “images” in the field imageID.
Warning
The file must be saved as a CSV without a header row.
Sample:
00:00:02:AF:00:E0:01:0F,adminoff1,10.0.1.150,Main admin office computer,5,14
00:00:02:AF:00:E0:01:04,adminoff2,,admin office 2 computer,5,13
00:00:02:AF:00:E0:01:02,adminoff3,,,5,12
Importing the File
After the file is prepared and saved, you will need to log into the FOG Management Portal.
Then click on the Hosts icon
.On the left-hand menu, click on Import Hosts.
Browse for your file, then click “Upload CSV”.
Create CSV From Network Scan
Per a community user in the forums. You can also use powershell to scan the network and create a csv. See Creating a csv host import from a network scan
 # examples, just gotta put subnets minus the final .x in a string array
 # Could also be params if this was a function
 $subnets = @("192.168.1", "192.168.2", "10.2.114", "192.168.0");
 $subnets | ForEach-Object { # loop through each subnet
     for ($i=0; $i -lt 255; $i++) { # loop through 0 to 255 of the subnet
         $hn = nslookup "$_.$i"; # run nslookup on the current ip in the loop
         if ($hn[3] -ne $null -AND $hn[3] -ne "") { # does the ip have a dns entry
             $hostN = $hn[3].Replace("Name:","").Trim(); # parse the nslookup output into a fqdn host name
             $mac = getMac /S $hostN; # does the hostname have a mac addr. Can also add /U and /P for user and password if not running from a administrative account
             if ($mac -ne $null) { # was there a mac for the host?
                 $macAddr = $mac[3].Split(' ')[0]; # use the first found mac address and parse it
                 "$hostN,$macAddr" | Out-File C:\hosts.csv -Append -Encoding UTF8; # add the hostname,macaddress to the csv
             }
         }
     }
 }
Managing Hosts
General
Once hosts have been added to the FOG database you can modify or delete them. Finding a host which you wish to edit can be done in two ways, the first is by listing all the hosts that exist. This is done by clicking on the “List All Hosts” button. The second way to locate a host is to use the search function. To search for hosts click on the “New Search” button, if you would like to search for all hosts you can enter a “*” or “%”. The search function will search in the host’s name, description, IP and MAC address.
Once a host is located, it can be edited by clicking on the edit button or on the Host Name itself. Clicking on the edit button will display all the properties that were shown during host creation with the addition of snapin, printers, active directory, service settings, hardware, virus history, and login information.
The entire host object can be removed from the FOG system by clicking on the delete option at the bottom of the Host Menu.
Multiple MAC Address Support
When FOG first registers your HOST computer it uses the first connected Ethernet cable and defaults it to the Primary MAC Address. Once the FOG Client is installed and reporting data back to the FOG server it may register other additional MAC addresses, such as wireless and other wired connections. Also, an additional MAC can also be added directly under the Host definition.
- These new MAC Addresses will need to be approved before FOG will take advantage of them.
Host Management
–> [Selected Host] –>*Additional MAC*Fog Configuration
–> MAC Address List –>*Approve Pending Addresses*
Fog Configuration
–> MAC Address List At this location you can also “Update Current Listings” giving updated information on the MAC Addresses and their manufactures, listing it under the Host.
Host Status
Host Status displays an indicator icon next to the host within the FOG UI showing the status of the machine. This function executes a ping based on the host’s name. So in order for this to work you must have an internal DNS server that is tied in with your DHCP server, so that when a DHCP address is given out, the DNS server is notified with the new IP. If that is setup correctly, you must make sure your FOG server is able to ping a host from the command line using:
ping somehostname
If the server isn’t able to ping the client, then the status of the host in the UI with always show as unreachable. If you can ping the client using the FQDN, like:
#Replace forproject.org with your domain suffix
ping somehostname.fogproject.org
Then you will need to adjust the DNS Search domains: setting on your sever. After making this change you will need to restart the apache server for it to take affect.
If after this, you still can’t ping your clients, the problem may be due to a firewall issue with the clients. In this case, client specific configuration changes might be needed.
- With an increase in Hosts(250+) this “ping” will delay the loading of the List All Hosts page. Disabling this feature will help in loading this page.
Fog Configuration
–> Fog Settings –> General Settings –> Untick FOG_HOST_LOOKUP
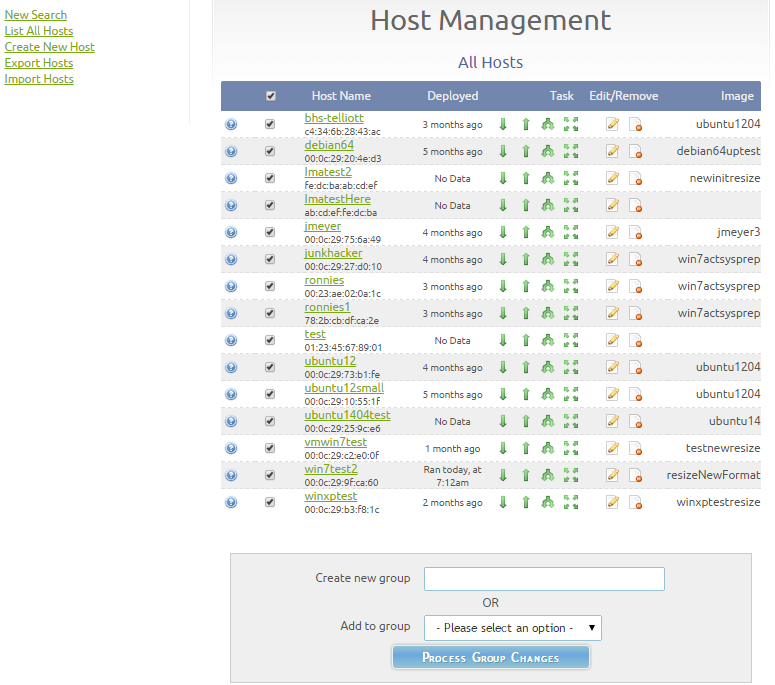
Creating Host Groups
FOG allows you to create groups of hosts which then allows you to take action on a whole grouping of hosts.
Hosts can be created either on the “List All Hosts” section or by doing a search for hosts.
To create a group select the computer you would like to be member of the group by placing a check in the box next to the hostname, or by clicking the check all button in the title row. After the hosts are selected scroll to the bottom of the screen and then enter a name in the create to group box or select a group to add the hosts to. Then click on the “Process Group Changes” button.