Example tasks with the FOG client
The purpose of this guide is to show you some example tasks that you can perform on your machines with the FOG client.
We will change the host name and create a snapin to install an application.
Prerequisites
We’re assuming that you have a running FOG Server and a machine with a running and approved FOG client on it. See above for all the instructions.
Change Host name
The host name of the machine can be set via the Fog Web UI.
This is often used in combination with deploying an image; after deployment the machine has the computer name as set in the image or by sysprep.
Start a browser, go to the Fog Web UI and log in
Go to ‘Host Management’ -> ‘List all Hosts’ and click on the machine you have just installed the FOG client on.
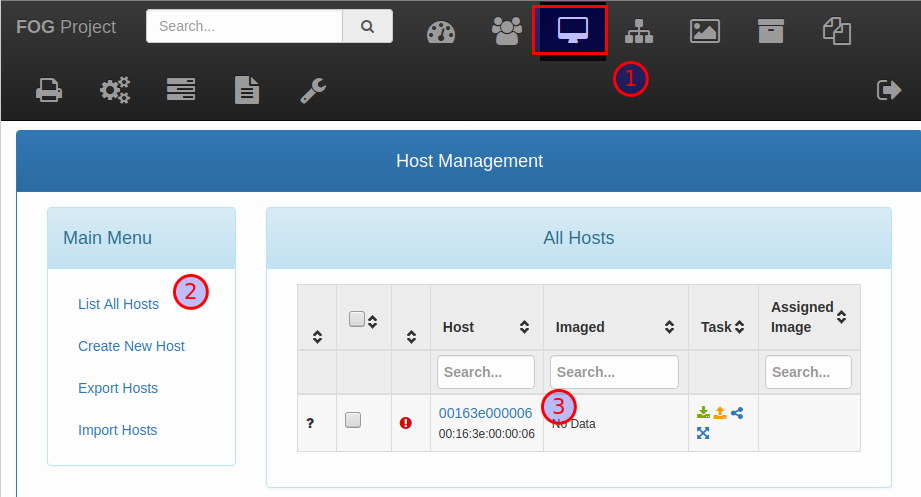
On the tab ‘General’, Change the ‘Host Name’ field into the name you want the host to have. Remember that Windows host names are limited to 15 characters.
On the bottom, clik on ‘Update’.
On your machine, wait for the next poll of the FOG client. Typically the FOG client polls the server each 2-3 minutes.
As changing the host name on Windows requires a reboot, you should see a popup that the FOG client will reboot the machine to change the host name:
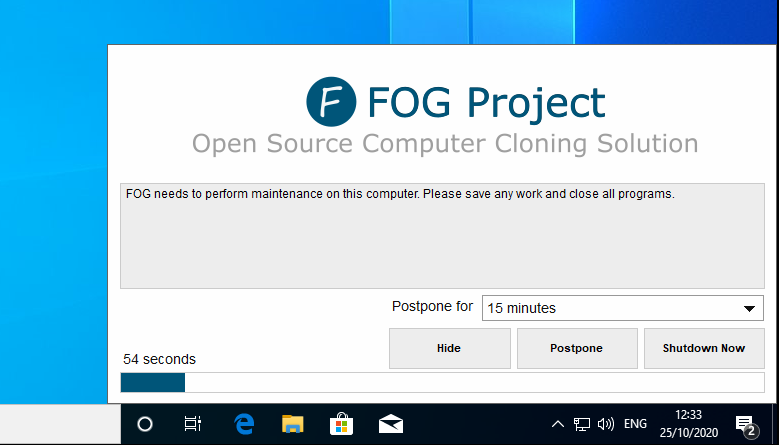
At the timeout, or when you click on ‘Shutdown Now’ the machine will reboot and the new host name will be set.
Install an application via a snapin
Snapins in Fog are generic tasks that you can execute. These tasks include running powershell scripts, executing MSI files and so on.
Create the snapin
In this tutorial we’re going to install the application 7-Zip via a Snapin. First we’re going to create the snapin, then we’re going to run the snapin on our machine.
Start a browser and download the installer of 7-Zip. Do not run it, just download it. Go to https://www.7-zip.org/download.html and download the MSI for 64-bit windows.
Go to the Fog Web UI and log in
Go to ‘Snapin’ -> ‘Create New Snapin’:
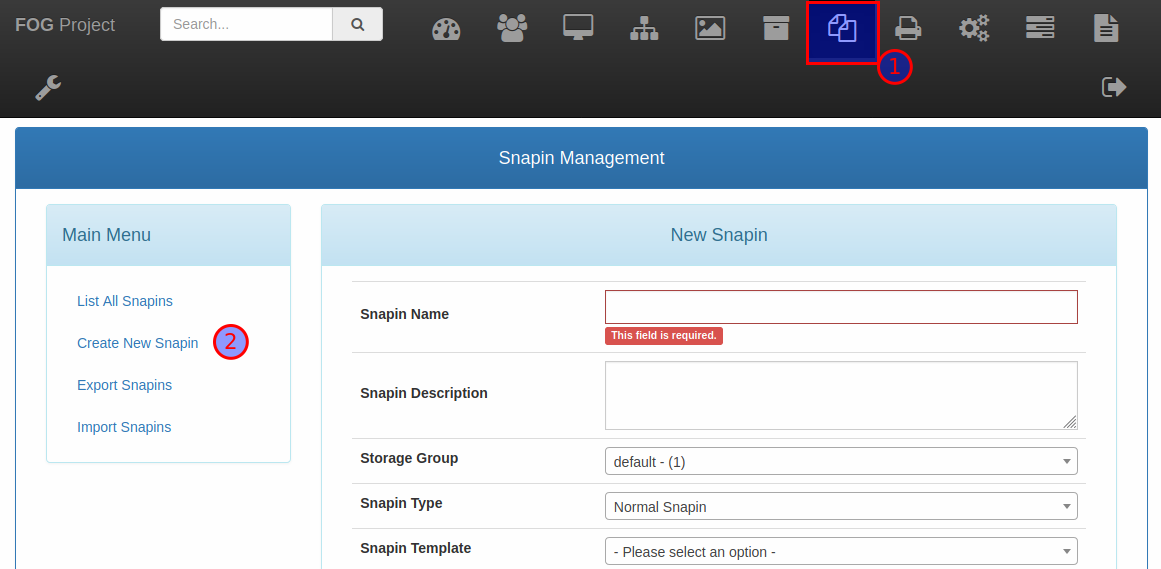
Fill in the following fields:
Snapin Name: Install 7-Zip
Snapin Template: Choose ‘MSI’ from the dropdown list. This just populate other fields in this web form to help you with the right parameters.
Snapin File: Click on ‘Browse’ and choose the 7-Zip MSI installer you’ve just downloaded.
Reboot after Install: Uncheck the radio button as we don’t need a reboot after installing 7-zip.
The screen should look like this (the version of 7-zip may of course change):
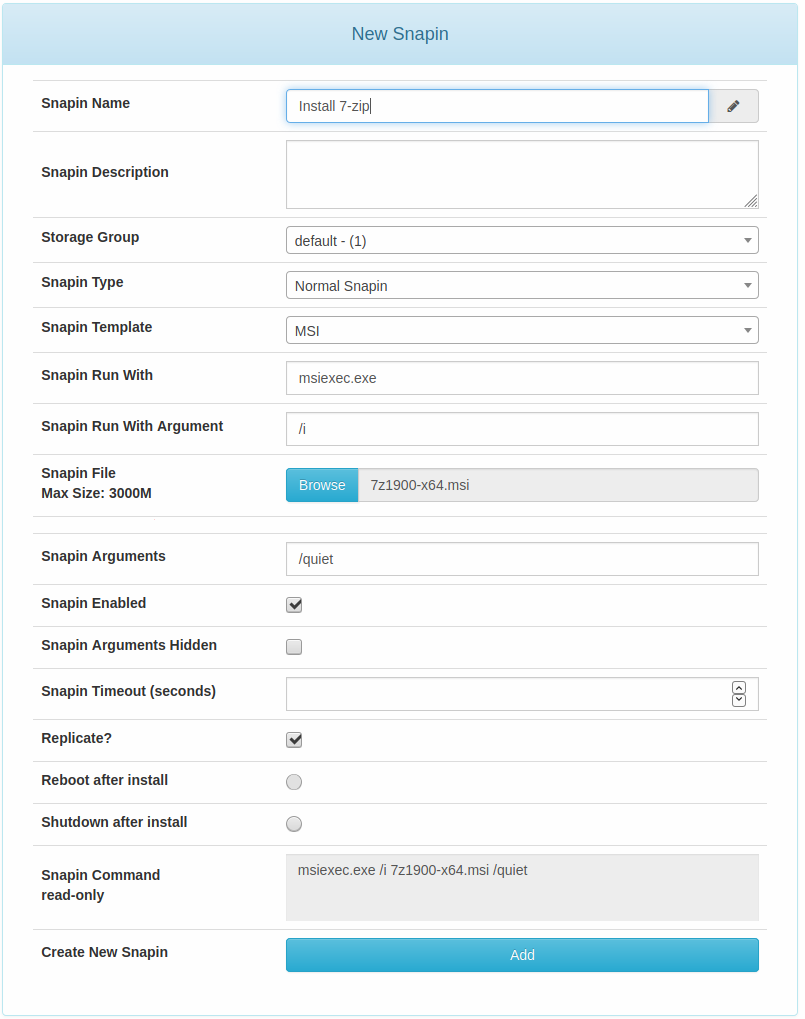
Important to note is the ‘Snapin Command read-only’ field. This is the command that is actually going to be executed by the FOG Client.
If all is OK, then click on ‘Add’. The MSI file will be uploaded to the FOG server and the new snapin will be saved in FOG.
Run the snapin on the machine
Now it’s time to run the snapin on the machine
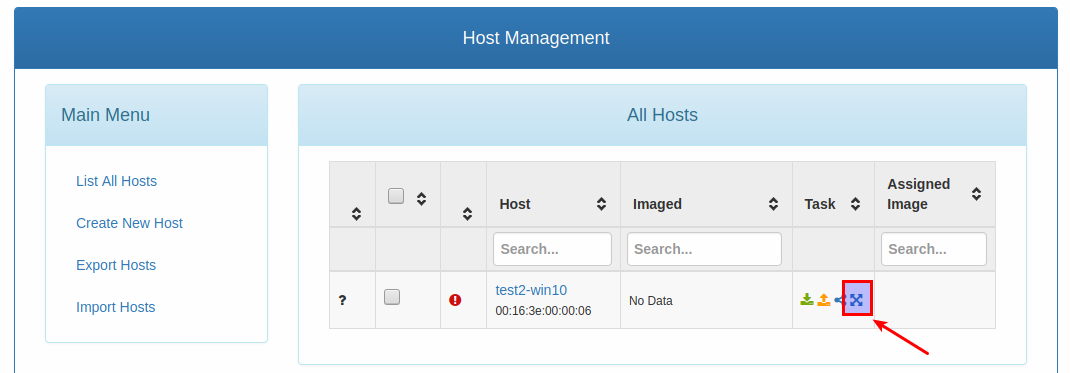
In the FOG Web UI, go to ‘Host Management’ -> ‘List all Hosts’
Click on the ‘Task list’ icon on the right of the host:
Click on ‘Advanced’ and choose ‘Single Snapin’ from below
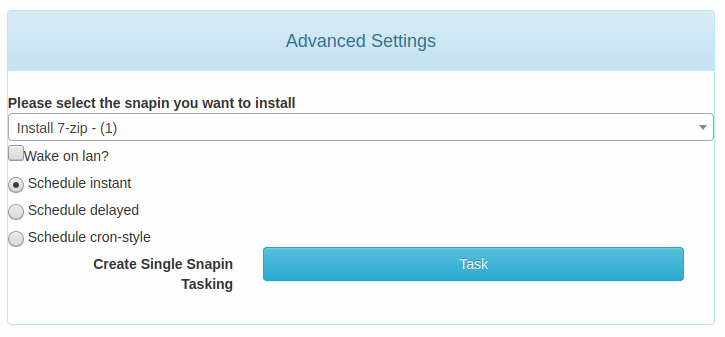
From the drop-down list, select ‘Install 7-zip’
Leave the other settings as they are and click on ‘Task’.
Now go to your machine and wait for the next poll of the FOG Client.
When the task starts, you should get a notification that the task has started.
Afterwards, you will get a notification that the task has ended.
By now the application 7-zip should be installed.
This way of running a snapin is OK for a single snapin for a single host. FOG offers ways to run a snapin on a number of hosts with a few clicks. Also installing multiple snapins on a new host can be done easily but that is out of scope for this tutorial.