Install FOG server
Before rushing into installing FOG you want to make sure you check the installation/requirements. The installation instructions here assume that you have a freshly installed server available that only contains the minimal set of packages.
Prerequisite
The preferred method of getting FOG is via Git.
Debian based
sudo -i
apt-get -y install git
RedHat based
sudo -i
dnf -y install git
Now that git is installed, you should be able to clone the FOG repository. Generally we recommend to put the repository inside of /root but if you’ve done this sort of thing before, put it wherever you want. Here’s how you clone the FOG repository/code to your local machine:
sudo -i
cd /root
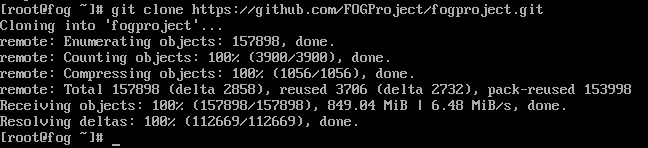
git clone https://github.com/FOGProject/fogproject.git
cd fogproject
Choosing a FOG version
FOG has different versions available at any given time that are developed within branches of our git repository. The dev-branch ‘dev’ version is typically a stable option since much testing still occurs before changes are committed, but not as much testing as is done for the longer-term “stable” version in the master branch.
!!! warning Be aware that you should not consider switching back to the master branch without thorough consideration. This is due to the database schema changes that might be introduced over time. For example when FOG was installed using the master branch (currently version 1.5.10) you can move forward to newer dev-branch versions like 1.5.10.53 with no problem. But if you want to switch to the master branch again you need to wait until the next official release, 1.5.11, is out. Doing otherwise is at your own risk!
If you want the latest and greatest, would like to contribute to testing new features, or were instructed to install the dev-branch version to troubleshoot an issue you simply need to git checkout the dev-branch like so (just ignore the comment lines starting with ‘#’):
#cd into where you cloned the git repo, e.g. /root/fogproject
cd /root/fogproject
#update all branches
git fetch --all
#switch to dev-branch
git checkout dev-branch
Then you can run the installer to perform an upgrade or new install as shown in the next section.
You can switch back to the master/stable branch with:
cd /root/fogproject
git fetch --all
git checkout master
You can see a list of current branches here: https://github.com/FOGProject/fogproject/branches
Alternatives
If you have issues or good reasons for not using Git, you can just download the FOG installer bundle as ZIP or tar.gz archive.
latest stable: [ZIP](https://github.com/FOGProject/fogproject/archive/master.zip) or [tar.gz](https://github.com/FOGProject/fogproject/archive/master.tar.gz)
latest dev: [ZIP](https://github.com/FOGProject/fogproject/archive/dev-branch.zip) or [tar.gz](https://github.com/FOGProject/fogproject/archive/dev-branch.tar.gz)
specific version: [ZIP](https://github.com/FOGProject/fogproject/archive/1.5.10.zip) or [tar.gz](https://github.com/FOGProject/fogproject/archive/1.5.10.tar.gz)
Simply extract the archive and start the installer as described below.
Run the installer
To start the installation process, follow the steps below. Running the installer must be done as root.
sudo -i
cd /root/fogproject/bin
./installfog.sh
Before all the components are installed, you are asked several questions to make sure the setup suits your situation and is ready to use right after the installer finishes:
SELinux
this only applies to RedHat based installs
If SELinux is enabled on your system, then the installer asks you to disable SELinux. The current version of FOG will give problems when SELinux is enabled. Everyone is encouraged to come up with a properly tested SELinux policy we can add to the project and apply for everyone.
Local firewall
If a local firewall (iptables or firewalld) is enabled, then the installer asks you to disable it. You can leave it enabled, but then you need to know how to manage the firewall and let all services pass. Currently, the best practice is to disable the firewall if you don’t know how to set up rules yourself. As with SELinux, everyone is encouraged to develop a proper set of firewall rules.
OS selection
The installer tries to guess the distribution you’re running. Just confirm the selection if it’s correct, otherwise choose the apropriate option.
Installation mode
With the same installer you can install a normal FOG server (called master node) or a FOG storage node. For the explanation of a storage node and how to install a storage node see todo: install storage node.
As we’re installing a FOG server here, choose N here.
Default network interface
The installer needs to know which network interface will be used for hosting PXE booting as well as sending images via unicast and multicast. If the installer guessed the right interface, then choose n(o) to proceed, using the pre-selected network interface.
Otherwise, choose y(es) and type in the name of the network interface (like eth0, ens192).
DHCP service
You have the option to run a DHCP service on the FOG server itself or, if you already have a DHCP server in your network, then you can answer n(o) to the following three questions. For more information on configuring an existing DHCP server to work with FOG, see Other DHCP Server than FOG. The questions on DHCP are in reverse order; the settings first, and finally if you really want to enable DHCP on your FOG server. This order might be changed in future versions of the installer.
DHCP router address
If you’re going to run a DHCP server on this FOG server, then type y(es) and type in the router (or default gateway) address that the DHCP server will advertise. If you have an existing DHCP server on your network, choose N here. (This question is irrelevant if you choose to use or set up your own DHCP server and will be hidden in future versions when DHCP is de-selected.)
DHCP handle DNS
If you’re going to run a DHCP server on this FOG server, then type y(es) to advertise DNS server IPs to the clients and type in the IP address of the local DNS server. If you have an existing DHCP server on your network, choose n(o) here. (This question is also irrelevant if you choose to use or set up your own DHCP server and will be hidden in future versions when DHCP is de-selected.)
Activate DHCP
If you want to run a DHCP server on this FOG server, then choose y(es). Otherwise choose n(o).
Internationalization
If you want the FOG web UI to provide additional languages, choose y(es) here.
HTTPS support
You can choose to set up FOG with encrypted communication. With FOG providing several different services (e.g. web UI for configuration, web API, PXE booting, client management using the fog-client) choosing HTTPS support has consequences:
A self-signed certificate is being generated for you
The Apache webserver is also set up to host the web UI through HTTPS
iPXE on-the-fly compilation happens to include that certificate into the PXE binaries provided by your new FOG server
Usually this works out of the box and doesn’t take manual intervention. But if you are unsure, you might still choose n(o) to reduce the risk of issues. Even without HTTPS support, the communication between fog-client and the FOG server uses a secured encrypted channel.
Hostname
This host name is used in the FOG web UI. Review the auto-detected hostname; choose n(o) to accept the suggested hostname, or y(es) to enter the correct hostname.
Summary
The installer prints out all options as chosen. If you are sure everything is correct, choose y(es) to proceed installing. Choosing n(o) will terminate the installer, and you will need to restart the process, answering all the questions again.
Installation questions
If the installer detects a mysql database server with an empty ‘root’ password, you are required to enter one to be set. In case the Linux account ‘fogproject’ has been used on this server, the installer will complain and provide information and instructions on how to mitigate the situation.
Database setup
While most of the installation runs without intervention, there is one step you need to do manually. The installer will prepare the database for you and then ask you to open your web browser and visit the FOG web UI to build the initial database schema or promote an existing database with new schema updates. Make sure you follow this step and only proceed with the installer (hit ENTER) after the schema update/setup has finished, or the installer will fail.
Final steps
If everything worked as expected, the installer end will with the following information:
* Setup complete

 You can now login to the FOG Management Portal using
 the information listed below.  The login information
 is only if this is the first install.

 This can be done by opening a web browser and going to:

 https://x.x.x.x/fog/management

 Default User Information
 Username: fog
 Password: password
Now your FOG Server is ready to use! Go ahead, login to the web UI and start using FOG (todo: link to docs with first steps) and have fun.
Install errors
Whenever the installer TBD…