Capture an image
After installing a FOG server, one of the first tasks you’ll do is to capture an image.
With ‘capturing an image’ we mean that you will make a copy of the contents on a hard disk of a machine that you want to duplicate on other machines.
The purpose of this guide is to show you the process of capturing an image and deploy it on other hardware with help of FOG. In this guide we will capture and deploy an image of a Windows 10 machine on older hardware that has a BIOS (and not UEFI hardware), but the process for a UEFI machine is almost similar.
Prerequisites
Before capturing the image, you need to make sure that the machine is ‘ready to image’. For a Windows machine this typically means that you have done the following:
Downloaded a Windows installer ISO that you copied onto DVD or USB drive
Boot the machine with the DVD/USB drive and install Windows with the options you want
Install additional programs and drivers that you want to include in the image
Configure specific Windows settings, like regional settings
Install the FOG client on it: after deployment, the FOG client takes care of additional tasks, like changing the host name, install additional applications, install printers, etc..
Sysprep the machine and shut it down
We’re assuming here that you have a running FOG server, that you are able to log in on the FOG Web UI.
Registering the machine at FOG
Now that the machine is ready to capture the image from, it is time to boot it from the network.
Plug in a cabled ethernet connection and in the BIOS, make sure the machine boots from the network.
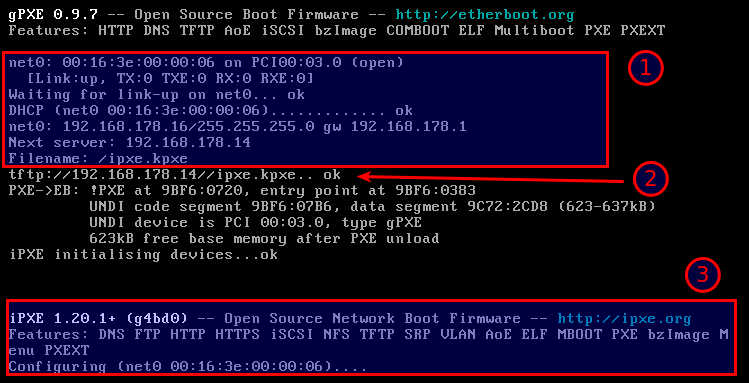
In the screenshot above you see a successful network boot:
The PXE client on the machine brings up the network link and via DHCP an IP address is requested. The DHCP server (in the screenshot, the DHCP server is at 192.168.178.1) hands out together an IP address (192.168.178.16/255.255.255.0), also the ‘next server’ (192.168.178.14) and ‘file name’ (ipxe.kpxe) options are handed over.
The PXE client on the machine then gets the ipxe.pxe image via TFTP
iPXE is executed and configures itself
Then you will be presented with the Fog boot menu:

Use your arrow keys to move the selection up and down. The default, ‘boot from hard disk’ is chosen in 3 seconds, so be quick.
In red you see the the statement that the host is NOT registered. It means that the host is not known by Fog.
For capturing an image, you need the host to be registered, so choose ‘Quick registration and inventory’.
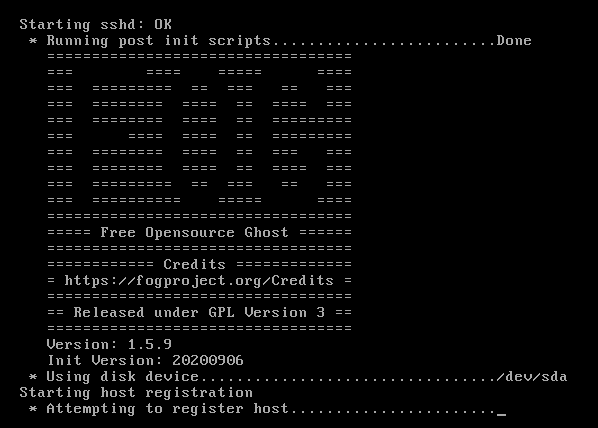
You’ll see some text scrolling on the screen as Fog registeres the host:
Then the client is rebooted. Shut down the computer.
Register the image at FOG
Log in on the Fog Web UI and go to ‘Image Management’ -> ‘Create New Image’:
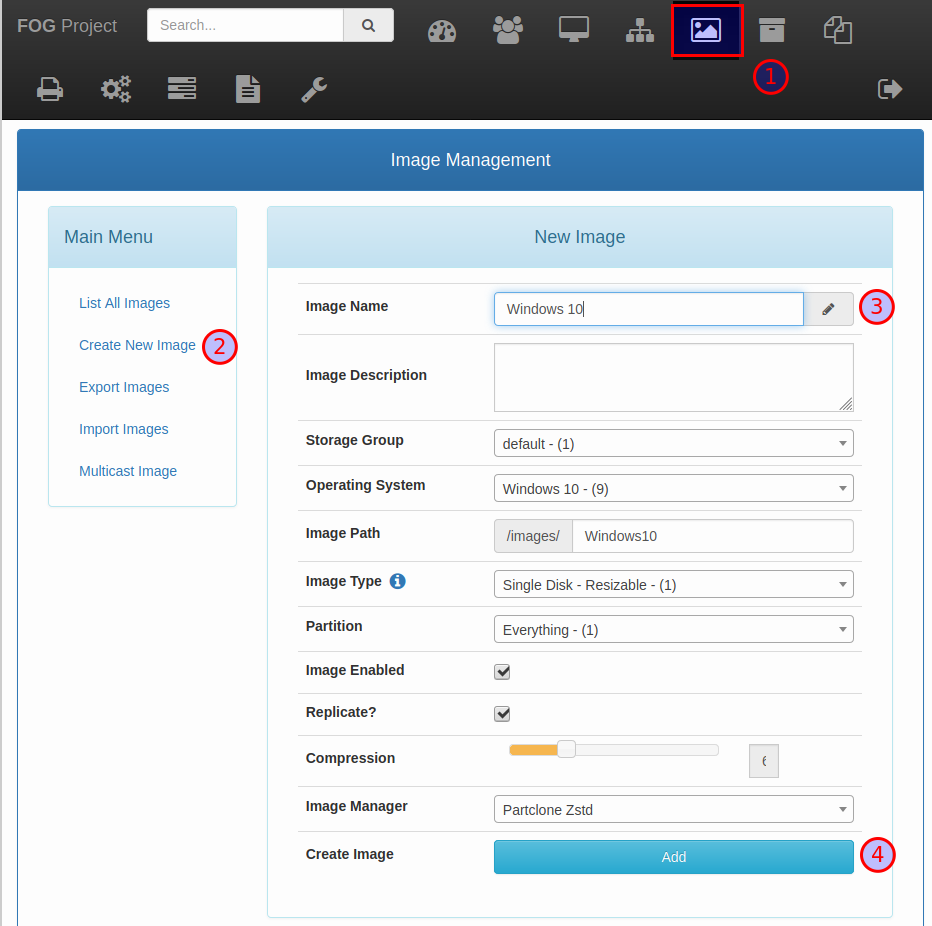
Give the new image a name and leave the chosen options as they are, and clik on ‘Add’.
The goal of this step is that you are registering a new image in Fog (you can use manage multiple images). The image will be a copy of the complete harddisk and all partitions on the harddisk will be captured and deployed.
Associate the image with the machine
Now to go ‘Host Management’ -> ‘List All Hosts’ and click on the machine you just have registered:
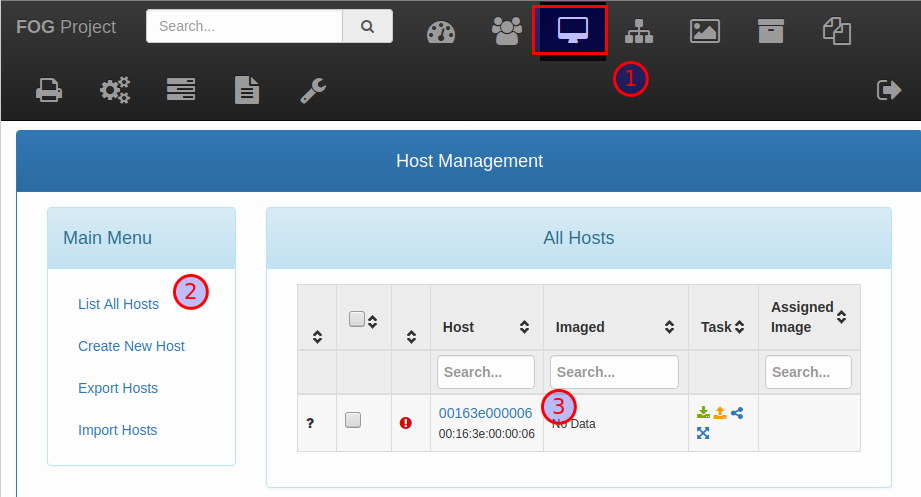
For now, the machine name is it’s MAC address. Don’t worry about that now as we will only use this host for capturing an image.
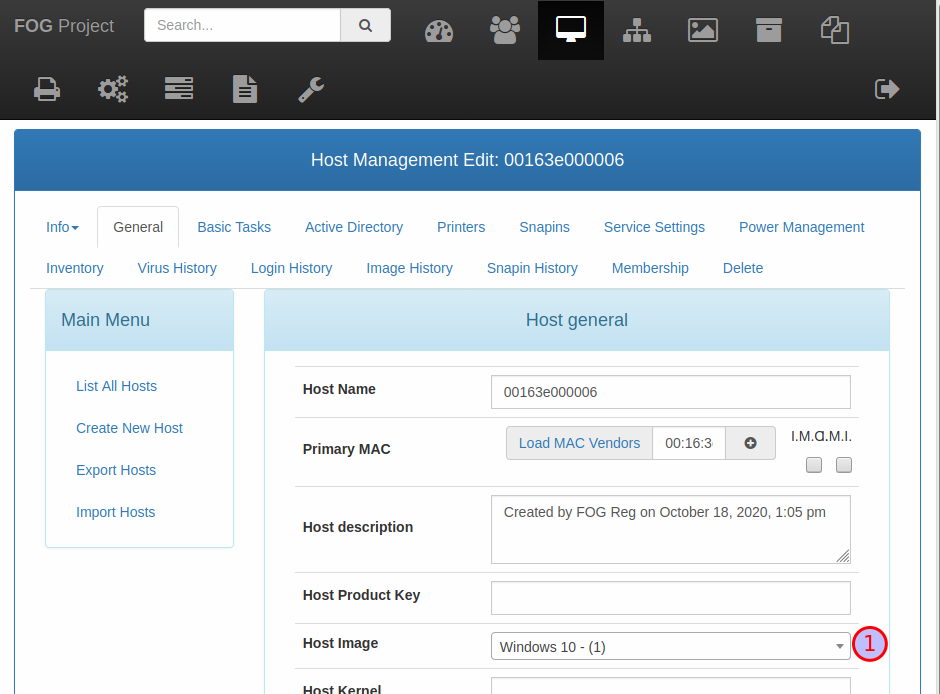
For the ‘Host Image’ drop-down box, choose the image you’ve just created. Then click on ‘Update’ in on the bottom of the screen.
You have now associated the Windows 10 image with this host.
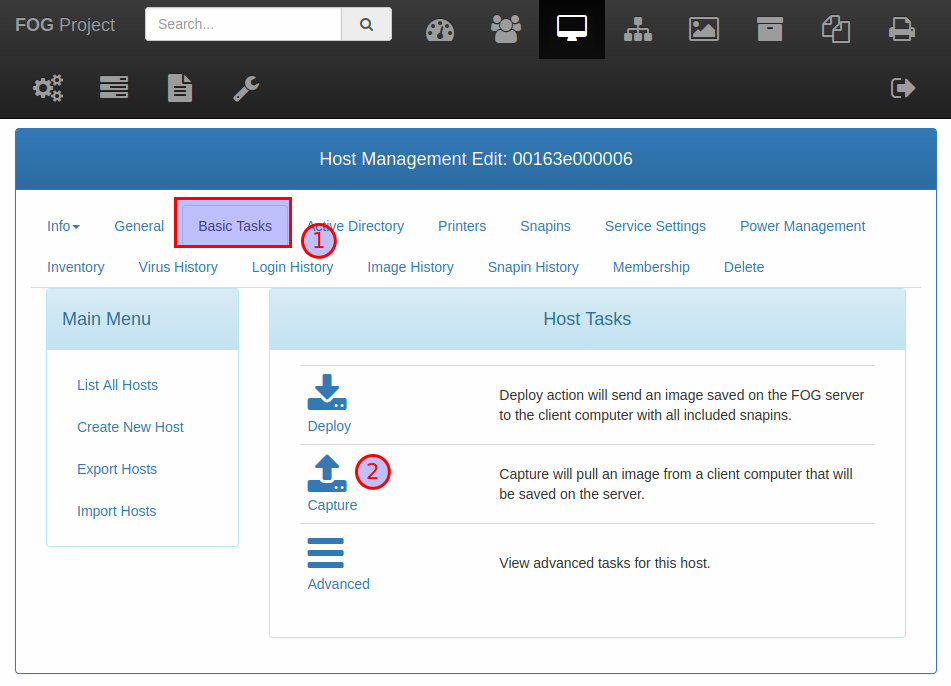
Create a capture task
We are now going to make a ‘capture taks’ for this host. This task instructs FOG that when this machine boots from the network, the contents of the harddisk must be captured and stored as the ‘Windows 10’ image on the FOG server.
While still in the Host Management of this machine, go to ‘Basic Tasks’ and choose ‘Capture’:
Here you can change settings of the imaging task.
Leave the options as they are and clik on ‘Task’:
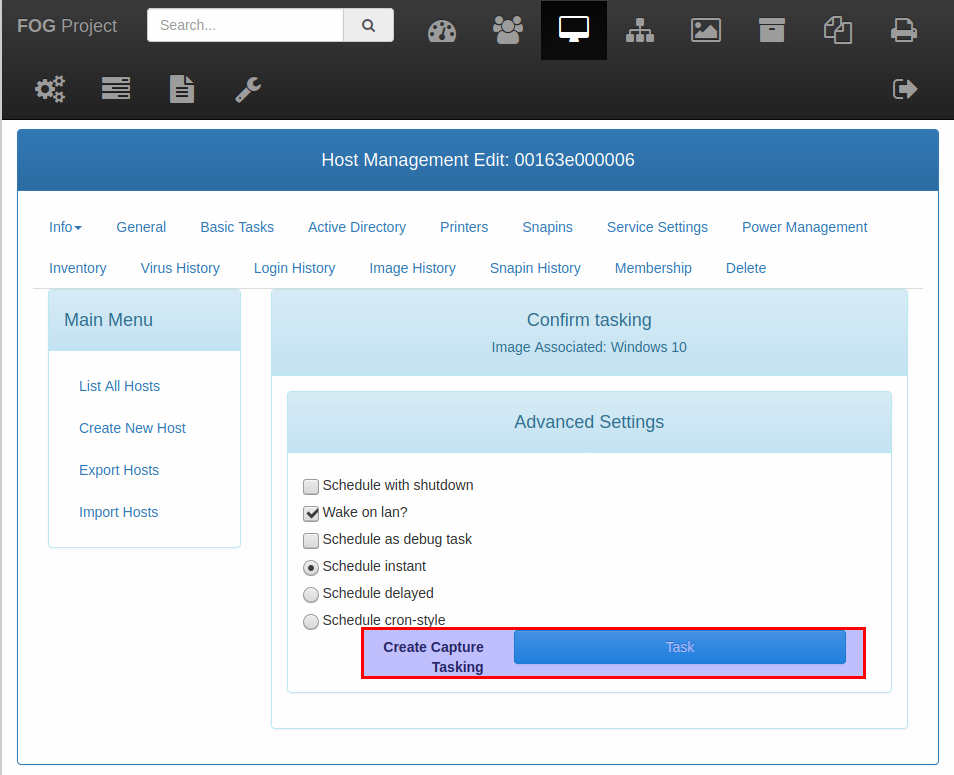
A capture task is now created.
Capture the image
Now start your machine and make sure it boots from the network.
As an image capture task is assigned to this machine, the FOG boot menu will not appear, but directly Partclone will be launched and the image will be captured:
On the console of your machine you will first see that FOG is doing some actions like resizing partitions and then Partclone will be executed:
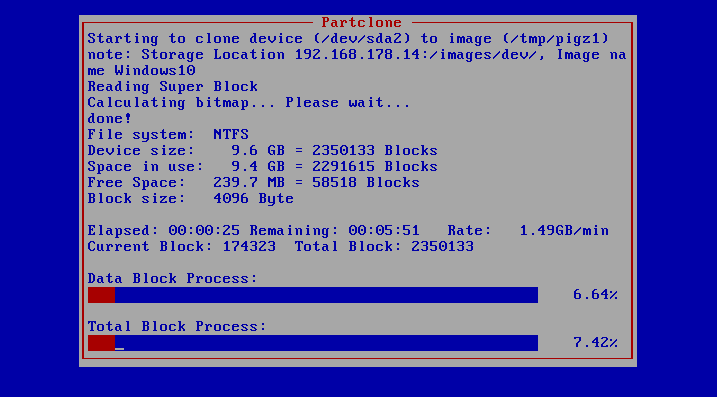
The contents of the harddisk will be read and via the network written as a compressed image file on the Fog server. Depending on the speed of your network and computers this may take a while.
Partclone may be invoked a couple of times depending on the number of partitions that need to be imaged.
When the capture has completed, FOG will update the database and the machine will reboot.
Now you have captured an image that you can deploy easiliy on other machines with FOG.