Install the FOG client
The FOG client is an agent running on the machines you are managing with Fog. With the FOG client you can perform various tasks such as managing printers, change the host name and join Active Directory (for Windows machines) and install software via ‘snapins’.
All these tasks are managed centrally from the FOG Web UI. The FOG Client ‘polls’ the FOG server to see if tasks need to be done and if so, executes them.
The purpose of this guide is to show you the process of installing the FOG client, register the host on the FOG server (if not already done during image deployment) and let the client perform some tasks via the FOG Web UI.
Prerequisites
We’re assuming that you have a running FOG server that was installed according to the instruction above in this manual
The machine that you’re installing the FOG client on is a Windows 10 machine.
info
.NET Framework version 4.0+ (Note: .NET 4 client profile will NOT work)
You can download the framework from here: Microsoft .NET Framework 4.5.1 (Offline Installer) for Windows Vista SP2, Windows 7 SP1, Windows 8, Windows Server 2008 SP2 Windows Server 2008 R2 SP1 and Windows Server 2012
Windows 10 comes with a version of .Net that will work.
Fog Client Installation
The following are the steps to install the client on a host
Download The Fog Client
Log in on the client machine, open a browser and browse to the Fog Web UI.
On the bottom of the Web UI, click on the link ‘FOG Client’ (you don’t have to log in).
Select Your installer
MSI Installer
Click on the link ‘MSI – Network Installer’ to run the MSI package (can also be used with gpo software deployment and other silent installs).
The url to download this is http://fogserver/fog/client/download.php?newclient
Smart Installer
Click on the Smart Installer link to download and run the smart installer. This is a cross-platform installation that detects your operating system
The url to download this is http://fogserver/fog/client/download.php?smartinstaller
Run The Installer
info
The following steps follow the msi installer wizard. The Smart Installer wizard is similar
Note
You may get a ‘Windows protected your PC’ popup. In that case you have to convince windows that this installer is safe to run. Click on ‘More info’ and ‘Run anyway’.
At the Welcome screen, click on ‘Next’
Accept the terms in the License Agreement (it’s the GPL license, so why not) and click on ‘Next’
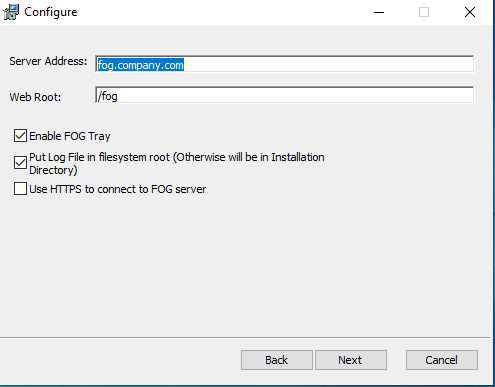
Fill in required fields:
Server Address: type in the hostname or IP address of the FOG Server.
Web Root: leave this to /fog
Leave the other options as they are
Click ‘Next’
Leave the destination folder as it is and click ‘Next’
Click on ‘Install’ and say ‘Yes’ at the UAC prompt.
Once the wizard has been installed, click on ‘Finish’.
Now the FOG client has been installed. In the Task bar there should be a new icon:
![]()
This icon tells you the version of the FOG Client and helps handle the notifications to the end user.
The first time the FOG client service runs on a machine, it will create a set of encryption keys and then tries to register itself at the FOG server.
This may take some time, as the startup type of the FOG client service is set to ‘Automatic - Delayed’. You may want to force start the FOG client directly after installation or reboot the machine.
Installer issue
When things go wrong and the setup is not able to install the fog-client software on your computer you want to check the log file in C:\Windows\Temp\FOGService.install.log for more details on why it failed.
Approve the machine
Start a browser, go to the Fog Web UI and log in
Go to ‘Host Management’ -> ‘List all Hosts’ and click on the machine you have just installed the FOG client on.
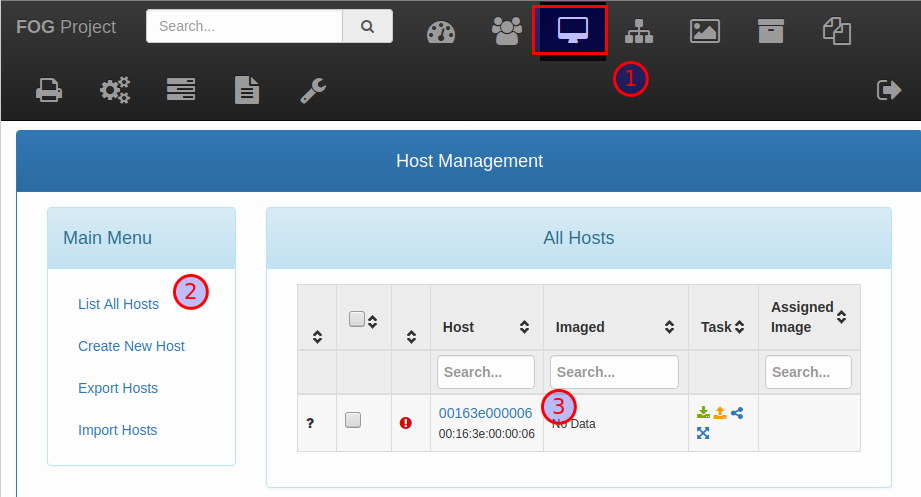
If the Windows OS was not deployed with FOG, then the FOG client is not yet registered at FOG and the client is not trusted by the FOG Server. We need to manually approve this machine:
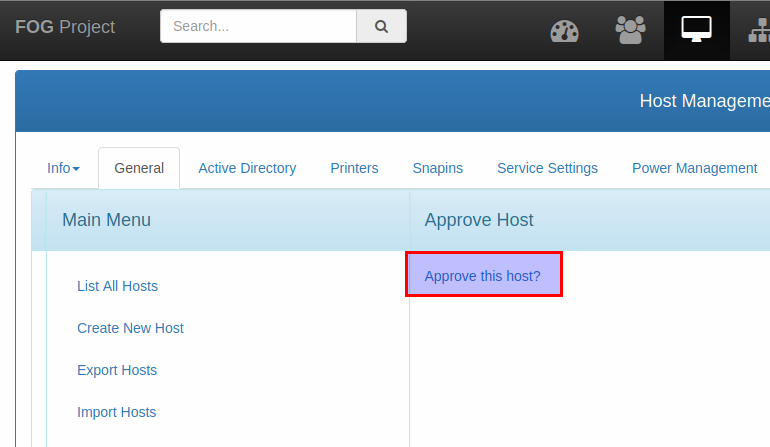
Click on ‘Approve this host ?’
If the Windows OS was deployed with FOG, then the machine will already be in FOG as we registered it during image deployment. The FOG client is considered as ‘trusted’ by the FOG server and will be already approved.
An approved host looks like this:
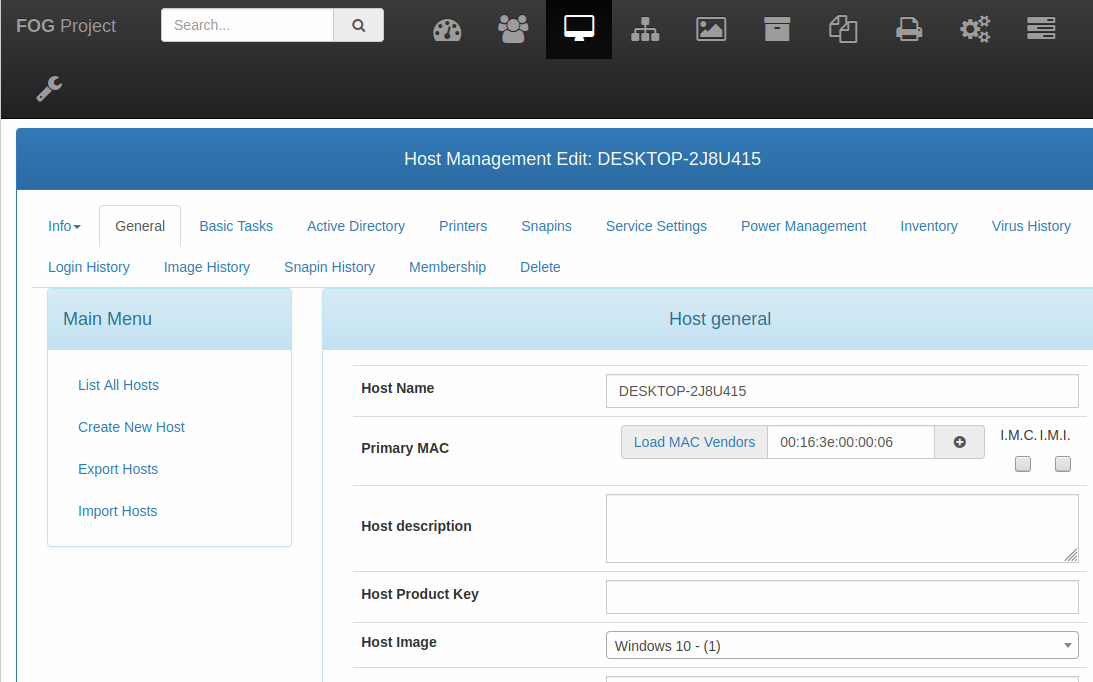
The FOG client can now execute tasks we’re assigning to it in the FOG Web UI.
Fog Client Silent Installation
If you would like to create a silent installation to deploy the fog client here is an example of a powershell script that would do that for you
Note
This script assumes that you can access your fogserver by the default name of fogserver which can be a hostname or a dns alias
#download the client installer to C:\fogtemp\fog.msi
Invoke-WebRequest -URI "http://fogserver/fog/client/download.php?newclient" -UseBasicParsing -OutFile 'C:\fogtemp\fog.msi'
#run the installer with msiexec and pass the command line args of /quiet /qn /norestart
Start-Process -FilePath msiexec -ArgumentList @('/i','C:\fogtemp\fog,msi','/quiet','/qn','/norestart') -NoNewWindow -Wait;
MSI Switches
Reference: https://forums.fogproject.org/topic/6222/msi-silent-install-without-tray-icon/2
Smart Installer Switches
See also https://news.fogproject.org/fog-client-v0-11-0-released-2/
Additional info
There are 2 services and 2 log files that run on windows.
Windows Services
the FogService and the FogUserService. The user service is run in a user’s context and helps with notification popups and user level tasks. Most operations are done by the FogService that runs as the system account.
Logs
You can find the fog log at C:\Fog.log and the user service log at C:\users\username\.fog_user.log